After collecting everything across the Continent on the way to the Visages, it’s time to finally face the first Axon. Keep in mind that enemies in this area are weak to Fire and Dark elements. In this guide, I’ll walk you through the Visages in detail, covering how to find all collectibles, defeat every boss, and achieve 100% completion.
Getting Started in Visages

When you first enter the Visages area, follow the path along the cliff and be sure to grab the Colour of Lumina on your right before continuing. Keep following the main path until you reach the center of the island, where you'll encounter an Expedition Flag.
After the cutscene, activate the Expedition Flag: Plazza. This area serves as your hub for the Visages region, with four paths branching out from it. One of these paths leads to the area's final boss (the obvious path between huge stone pillars), but you'll want to explore the other three first, each themed after a different emotion.

Near the Expedition Flag, you'll find a Gestral Merchant named Blooraga. He sells the Pictos - Healing Share, and if you can defeat him in battle, he will also sell Sciel Weapon - Sadon.
While you technically can skip the three emotion-themed paths and head straight to the final boss, completing all three first will prevent the area boss from gaining bonus abilities, plus you'll earn valuable rewards along the way.
Joy Vale

Starting from the Expedition Flag and going counterclockwise, the first path on your left leads to Joy Vale.
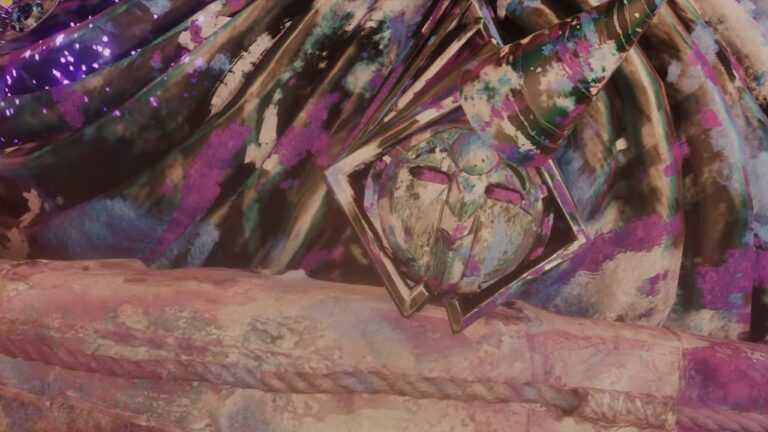
Follow the path, and eventually, the mood changes into a greenish, grassy vibe. At the end of the path, you will encounter a huge mask. Approach it and get in. Continue forward, defeat the pair of Moissonneuses, and you'll reach the Expedition Flag: Joy Vale.


From here, you'll see some dancing enemies ahead, Moissonneuse and Chapalier. After killing them, turn left and find Chroma x2,940 under a tree. Then, turn to your right and head up the slope to kill the patrolling enemies. Behind them, you will find Journal - Expedition 69.


Continue along this path, and you'll come across a Mime, shyly hiding behind a tree. Defeat it to earn the Verso Outfit - Baguette and Verso Haircut - Baguette.
Once done, head back towards the Expedition Flag. Now, instead of turning left, head to the slope on the right. Here, you will find a new monster, the creepiest of all, the Contorsionniste. Kill it to get Contorso, a weapon for Verso. Near it, get the Healing Tint Shard.


Get back towards the main path, past the dancing enemies, and you will see a huge floating mask up front. Before approaching it, look to your right to find some more enemies. Kill them, then pick up a Resplendent Chroma Catalyst behind them, beneath one of the grassy statues. Climb the slope on the right, kill the Boucheclier, and pick up Pictos - Confident Fighter at the end of the path.

Head back down towards the intersection and now look to your left. Go towards the narrow pathway to get Verso Weapon - Confuso, after beating the Contorsionniste, who came in the creepiest way. After this, head towards the giant floating mask.
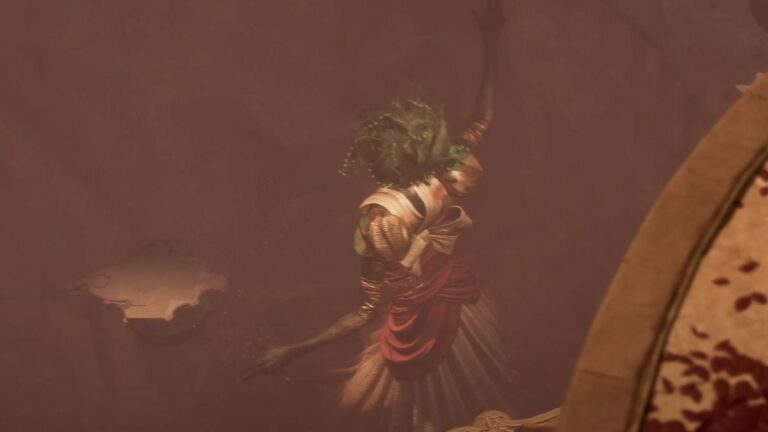
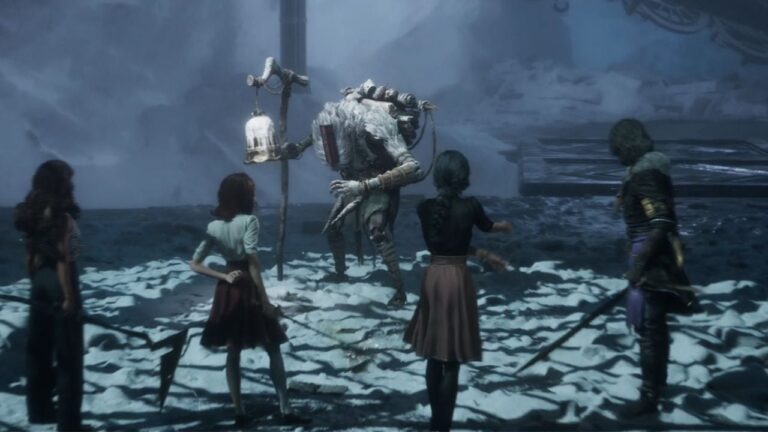
Boss: Jovial Moissonneuse

When you approach the giant mask, it will ask you a question. Answer "Joy" to trigger a boss battle with the Jovial Moissonneuse.
This red-glowing version of the Moissonneuse has higher damage and health than regular versions. It fights alongside a Chapelier and Boucheclier. All three enemies are weak to Fire and Dark damage, making Lune, Maelle, and Sciel valuable party members for this fight.
The boss's attacks include:
- Short Combo: A 3-hit sequence of horizontal slash, upward slash, and downward slam
- Long Combo: A 6-hit sequence with various slashes and delayed attacks
- Mask Heal: Healed by the floating mask behind
This boss also introduces Berserk status, which increases the character’s damage every turn, up to 12 times, with a 5% stack each turn.
You’ll need to get familiar with the boss’s attack patterns, as the parry timing can be quite tricky. The Chapelier, a floating enemy, can be a major nuisance with its frequent debuffs. Focus on eliminating it first by using free aim attacks to bring it down quickly.
Defeating this boss rewards you with Lune Weapon - Chapelim and a Resplendent Chroma Catalyst.
Sadness Vale

After defeating the Joy Vale boss, you'll return to the Plazza Expedition Flag. 1 emotion down, 2 more to go. Let’s head into the second passage, the one just before the main path.
Follow this path and eventually, the light turns blue, such a sad color. Get into the huge mask, and you will be teleported to the Sadness Vale. Folow the main path, deal with the Contorsionniste, and you will reach the Expedition Flag: Sadness Vale.


From here, take the right path up the slope first to get some collectibles. Kill the enemies, and then climb up the ledge on your right to get Chroma x2,940. Get back to the Expedition Flag, kill the 3 sad Nevrons, and head to the left side to get a Resplendent Chroma Catalyst on one of the graves.

Keep following the left side path, up to a slope. Once you are in an open area, look behind what looks like a crumpled root to get Chroma x2,940. Continue forward to fight an optional boss, the Chromatic Ramasseur.
Optional Boss: Chromatic Ramasseur

This upgraded version of the Ramasseur enemy has some dangerous abilities, including instant-kill attacks. The unique challenge in this fight is that the boss attacks continuously until you parry enough times to break it.
The boss is weak to Light damage. When you break the boss's attack pattern, inflict as much damage as possible before it recovers.
Its attacks include:
- Mortal Hit: A deadly attack that will instantly kill any character it hits
- Nevron Arm Combo: A series of 4 or 8 swings using its severed arms
The main challenge in this fight is learning how to perfectly parry each time. Take the time to study the patterns and timing, once you consistently parry the attacks, the boss battle becomes much easier.
Defeating this optional boss rewards you with Pictos - Augmented Counter II, Resplendent Chroma Catalyst x2, and Colour of Lumina x5.


After killing it, look towards the backside of this arena to find Pictos - Glass Canon.
Return to the main path and continue heading toward the giant mask. Before reaching it, there should be two slopes on the right. Head to the left one first, kill the enemies, follow the path up, and you will find a Resplendent Chroma Catalyst behind the rock wall on the left. Behind it, there is a climbable ledge, get on it and get the Journal - Expedition 39.

Drop back down towards the split, and now take the right path. At the end of the pathway, you will see an Energy Tint Shard, defended by some enemies. Now, let’s get back to our main mission.
Approach the giant mask and answer "Sadness" to begin the boss fight with the Sorrowful Chapelier.
Boss: Sorrowful Chapelier

This enhanced version of the Chapelier has increased health and damage. It fights alongside a Boucheclier and Moissonneuse. All three are weak to Fire and Dark damage.
The boss's attacks include:
- Triple Strike: Three downward strikes that can inflict the Inverted status (turns healing into damage instead)
- Axe Slash: Three sweeping attacks that can hit all party members and Mark them
- Mask Launch: Summons orbiting masks that can attack your characters
- Mask Exhaustion: The mask in the background will periodically apply Exhaustion to one of your characters
Eliminate the supporting enemies first, then focus on the boss. The best way to damage the boss is to use your free-aim shots. So having Fire and Dark element weapons is a good idea againts it. Watch out for the Inverted status, don't heal affected characters until it wears off. Defeating this boss grants you Monoco Weapon - Boucharo and a Resplendent Chroma Catalyst.
Anger Vale

After defeating the Sadness Vale boss, you’ll automatically spawn near the Plazza Expedition Flag again. 2 emotions down, let’s go to the last one. The pathway to the third Vale is past the main pathway, so behind the Gestral Merchant.


Follow the path down the handholds on the wall. After going down the slope, before approaching the mask, look to your left to get Chroma x1,470.
After being teleported by the mask, defeat the enemies ahead, and you'll reach the Expedition Flag: Anger Vale. Look right from the Expedition Flag and head onto the slope to get a Resplendent Chroma Catalyst.


Now, head back toward the main path and continue exploring the area before making your way toward the giant mask. Start by heading left and keep hugging the left wall until you get Chroma x2,940. Head back until you see a big statue, turn left, and climb the slope to kill the enemies here to get a Revive Tint Shard that they were angrily guarding for some reason.
Follow the path to the left and slide down using the magic rope. Kill the Contorsionniste and get the Pictos - Powered Attack. Next, head outside and you will see a cave right across.

Before going into the cave, turn left onto the slope, kill the enemies awaiting you there, and get a Resplendent Chroma Catalyst just behind them. Now, let’s head into the cave you saw earlier. The path will split into two, let’s take the left one first. Kill the enemies and get the Pictos - Double Burn. Next, head back and go to the other path, which leads to the Manor.


This Manor door will teleport you to a playroom with a piano. Beside the piano, get the Record - Verso. You can play the piano for some really nice tunes. Next, open the door on the left and pick up Journal - Unknown at the foot of the bed. That’s everything you can get here. Now let’s get back to the Anger Vale.
Approach the giant mask and answer "Anger" to trigger the boss fight with the Seething Boucheclier.
Boss: Seething Boucheclier

This upgraded Boucheclier has increased health and damage. It fights alongside a Chapelier and Moissonneuse. All three are weak to Fire and Dark damage. The boss's attacks include:
- Sword Combo: A 3-hit combo with two horizontal swipes and a downward slash
- Prepare to Counterattack: The boss charges up for its shield slam attack
- Shield Slam: A Gradient Attack that requires a Gradient Counter
- Mask Speed: The mask in the background periodically allows the boss to take another turn immediately
Just like with previous bosses, it’s best to eliminate the supporting enemies first. Use free-aim shots to quickly take down the Chapelier. As for the boss, keep applying Burn and stack it as much as possible. Bring Sciel to deal massive Dark-element damage with her skills.
When the boss begins preparing a counterattack, avoid attacking to prevent triggering it. Instead, use this time to buff or heal your party. For the Shield Slam move, be ready to counter it with Gradient Counter for a strong response.
Defeating this boss rewards you with Maelle Weapon - Clierum and a Resplendent Chroma Catalyst.
The Summit and Final Boss

After completing all three emotion vales, you're ready to face the area's final challenges. Use the Expedition Flag in the Plazza to rest and spend attribute points, because we are approaching a strong boss here. When you are ready, head towards the main path, the passage between two huge stone pillars.
You'll encounter a Fading Man for a brief conversation, then continue along the path using grapple points as needed until you reach the Expedition Flag: Summit. Climb the stairs and proceed until a cutscene plays, leading to the first boss fight.
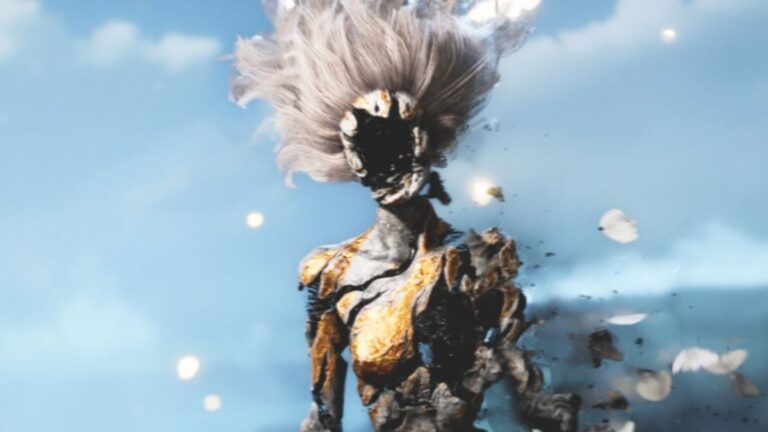
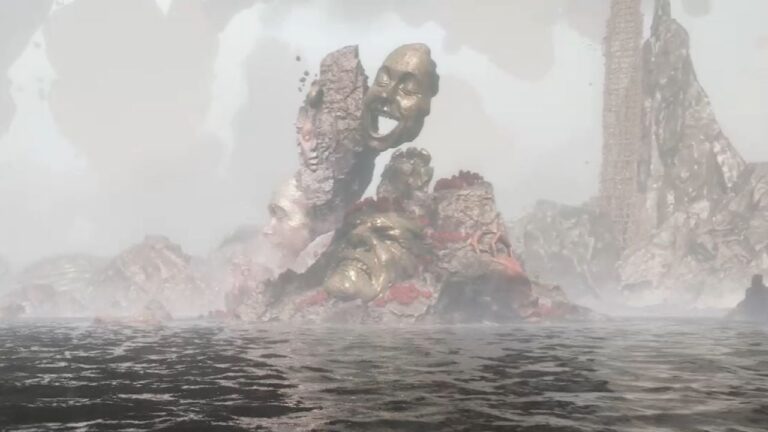
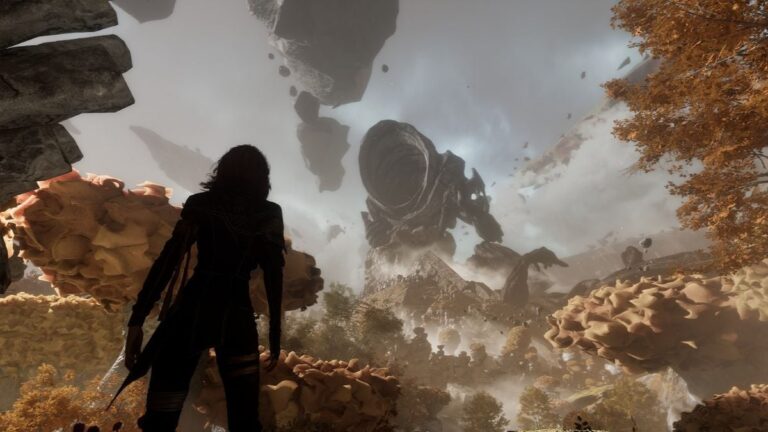
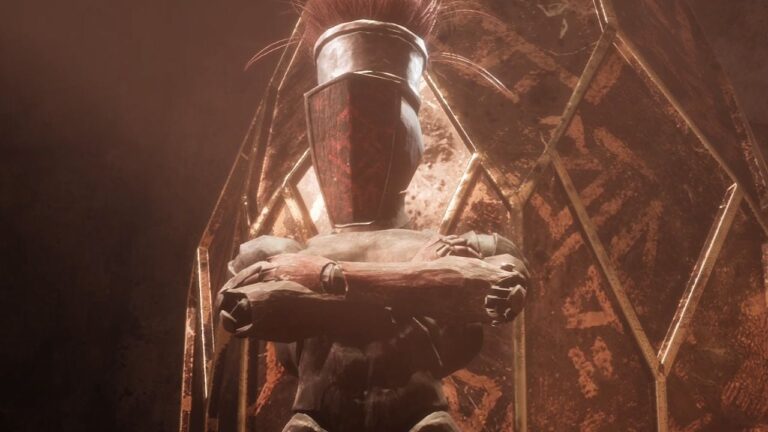
Boss Fight: Visages

The Visages is the main boss in this area, a massive floating entity surrounded by stone masks that represent its identities. Throughout the battle, you’ll face a mirror that reflects various emotions. On a deeper level, this encounter symbolizes confronting your own emotions, which is a surprisingly profound concept.
Each emotion displayed in the mirror corresponds to a different attack pattern used by the Visages:
- Peace Mask: Sends four shockwaves that can give the boss shields if they hit you
- Confidence Mask: Slams to create a shockwave that heals the boss if it hits your party
- Determination Mask: A 3-hit combo with a jump-required second attack
- Doubt Mask: A 5-hit combo with alternating attacks
- Anxiety Mask: Two quick spear smashes repeated twice
The Visages is weak to Fire and Dark damage, just like the previous bosses. To maximize your effectiveness, bring characters like Lune, Maelle, Sciel, and Monoco into the fight. Focus on stacking burn damage to gradually chip away at its health, and make use of Sciel’s Foretell stacks to unleash powerful Dark attacks.
As always, mastering parry and dodge timings is crucial, memorizing attack patterns will make the encounter much smoother.
Important: Before finishing the fight, heal your party and remove any debuffs, as a second battle will immediately follow, continuing from your current party state.
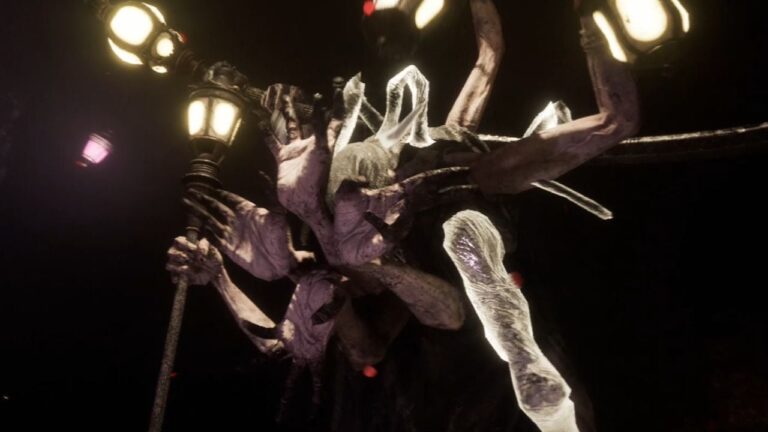
Boss Fight: Mask Keeper

After beating Visages, a cutscene will play, and you will fight the second phase of Visages, the Mask Keeper. The Mask Keeper is the true Axon of the Visages area. If you skipped the three emotional paths, the boss can call upon those masks for help during this fight, granting it various advantages. Defeating the three previous bosses prevents these abilities.
The boss is resistant to Ice but weak to both Fire and Dark damage. Its key feature is a defensive aura that appears when it drops below 50% health, granting it a shield whenever it successfully hits your party. So it’s good to have Maelle’s Breaking Rules skill or Monoco’s Chevalier Piercing.
Its attacks include:
- Swing Combo: A 3-hit combo against a single target
- Vehement Attack: A 4-6 hit combo that hits all party members
- Chaotic Combo: A complex 7-hit combo against a single target
- Fire Sword Attack: A series of three attacks followed by a Gradient Attack requiring a counter
- Storm Attack: A quick 4-hit combo on a single character
- Defensive Aura: Grants shields when successfully hitting your party
- Mask Abilities: Various effects if you didn't defeat the previous bosses
The strategy remains the same, continuously stack Burn effects to steadily chip away at the boss’s health. Use shield-breaking skills to quickly bring down its defenses, and always be prepared to counter with Gradient Counter when the opportunity arises. Focus on Breaking the boss to gain a significant advantage and open it up for high-damage combos.
Defeating this final boss rewards you with Pictos - Immaculate, Resplendent Chroma Catalyst x6, and Recoat x2.
Congratulations! You've now completed the Visages area of Clair Obscur: Expedition 33, defeating your first Axon in the process. After the final scenes, you'll return to camp before continuing your journey to the second Axon, Sirene.